
ERS Multi-factor Authentication (MFA) – Passkey Help
The U.S. Geological Survey (USGS) Earth Resources Observation and Science (EROS) Registration System (ERS) centralizes all existing user profile and authentication for USGS EROS Web services into a single independent application.
EROS Registration System (ERS) now offers an option of accessing accounts using a Multi-factor Authentication (MFA) passkey.
The option allows users to login into ERS and associated websites; EarthExplorer, GloVis, HDDS, etc. via cell phones, tablets, etc. that store the passkey. Users have the option of using the registered Username/Password or the Passkey option.
EROS Multi-factor Authentication (MFA) Passkey Login Options
Username/Password Option
- New Account, Click Create New Account. (Figure 1)
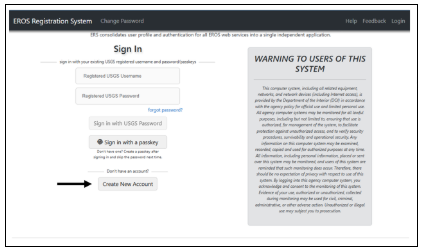
(ERS Help documentation for creating a new account)
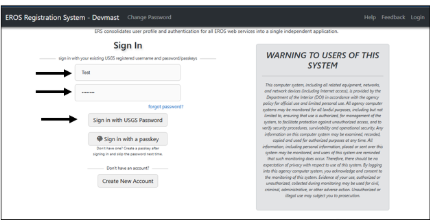
2. Already have a registered Username/Password, enter information in the Sign In page. (Figure 2)
New Passkey Option – Adding Authenticator (device)
The first time adding an authenticator, Users must login registered username/password. (Figure 1) If not a registered user, then click the Create New Account (Figure 2)
1. Login in with registered Username and Password. The ERS profile page will display. (Figure 3)
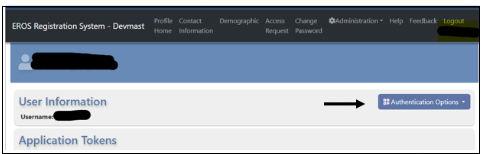
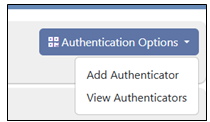
2. On the right is dropdown Authentication Options. (Figure 4) Click Add Authenticator.
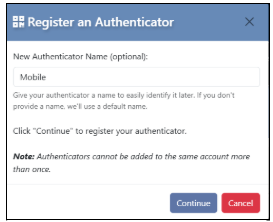
3. Register an Authenticator popup window asks for a New Authenticator Name. This is optional, helpful if user registers different devices. Click continue. (Figure 5)
4. Choose device to save passkey. Listed available choices will depend on the users’ devices. As more devices are made available, they will be added to the list. Click on iPhone, iPad, or Android Devices. Click Next (Figure 6)

5. For purposes of this document, will register on Android and iPad. The saving of the passkey depends on user’s device settings, security, etc. Basic steps:
a. Make sure Bluetooth is enabled on the device to save passkey
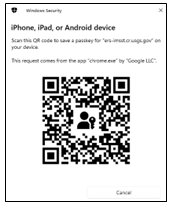
b. QR code will display, (Figure 7) Scan code.
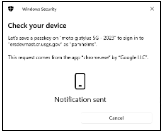
c. The device receives notification to trust the site, wording and actions depend on the device. On the website, a window displays that a notification was sent to device. (Figure 8)
d. On device click continue or connect. Depending on device, will ask for security access, such as fingerprint, face recognition, password, etc.
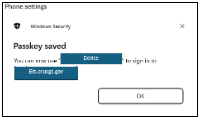
e. On the website, a message displays when the passkey is saved to the device. (Figure 9)
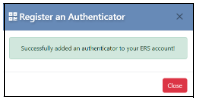
f. On the website, notice that the authentication was successfully added users ERS account. (Figure 10)
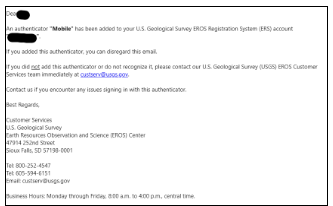
g. User will receive an email from custserv@usgs.gov (Figure 11) Subject: New Authenticator Added to Your Account
Established Passkey Option – Already have a saved passkey for the ERS account.
- Users accessing EROS websites (Earthexplorer, HDDS, GloVis, etc) that requires a login and already have a registered ERS account and a saved passkey.
a. Click Login on the website.
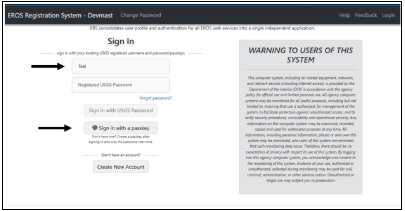
b. At the ERS website, enter registered username and Click Sign in with a passkey. (Figure 12)
2. The list of devices will display. Highlight on iPhone, iPad, or Android choice. Or, if device is listed, highlight the device. (See steps 4 -5a-e)
a. Scan the QR code or check phone for connection notification.
b. Follow the steps on the device.
c. Users will be logged in
View or Delete Passkey
- To view registered authenticators,
a. Go to ERS profile page at the drop-down menu (Figure 4),
b. Choose View Authenticators All registered authenticators will be listed. (Figure 13)

2. The saved passkey information can be deleted from ERS site.
a. Go to ERS profile and the drop-down menu. (Figure 4)
b. Choose View Authenticators
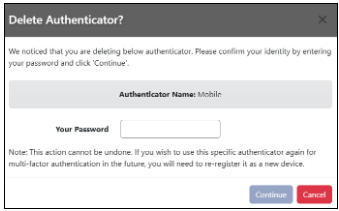
c. Click the trash bin next to the authenticator to delete.
d. Users enter the registered ERS password. (Figure 14)
The U.S. Geological Survey (USGS) Earth Resources Observation and Science (EROS) Registration System (ERS) centralizes all existing user profile and authentication for USGS EROS Web services into a single independent application.
EROS Registration System (ERS) now offers an option of accessing accounts using a Multi-factor Authentication (MFA) passkey.
The option allows users to login into ERS and associated websites; EarthExplorer, GloVis, HDDS, etc. via cell phones, tablets, etc. that store the passkey. Users have the option of using the registered Username/Password or the Passkey option.
EROS Multi-factor Authentication (MFA) Passkey Login Options
Username/Password Option
- New Account, Click Create New Account. (Figure 1)
(ERS Help documentation for creating a new account)
2. Already have a registered Username/Password, enter information in the Sign In page. (Figure 2)
New Passkey Option – Adding Authenticator (device)
The first time adding an authenticator, Users must login registered username/password. (Figure 1) If not a registered user, then click the Create New Account (Figure 2)
1. Login in with registered Username and Password. The ERS profile page will display. (Figure 3)
2. On the right is dropdown Authentication Options. (Figure 4) Click Add Authenticator.
3. Register an Authenticator popup window asks for a New Authenticator Name. This is optional, helpful if user registers different devices. Click continue. (Figure 5)
4. Choose device to save passkey. Listed available choices will depend on the users’ devices. As more devices are made available, they will be added to the list. Click on iPhone, iPad, or Android Devices. Click Next (Figure 6)
5. For purposes of this document, will register on Android and iPad. The saving of the passkey depends on user’s device settings, security, etc. Basic steps:
a. Make sure Bluetooth is enabled on the device to save passkey
b. QR code will display, (Figure 7) Scan code.
c. The device receives notification to trust the site, wording and actions depend on the device. On the website, a window displays that a notification was sent to device. (Figure 8)
d. On device click continue or connect. Depending on device, will ask for security access, such as fingerprint, face recognition, password, etc.
e. On the website, a message displays when the passkey is saved to the device. (Figure 9)
f. On the website, notice that the authentication was successfully added users ERS account. (Figure 10)
g. User will receive an email from custserv@usgs.gov (Figure 11) Subject: New Authenticator Added to Your Account
Established Passkey Option – Already have a saved passkey for the ERS account.
- Users accessing EROS websites (Earthexplorer, HDDS, GloVis, etc) that requires a login and already have a registered ERS account and a saved passkey.
a. Click Login on the website.
b. At the ERS website, enter registered username and Click Sign in with a passkey. (Figure 12)
2. The list of devices will display. Highlight on iPhone, iPad, or Android choice. Or, if device is listed, highlight the device. (See steps 4 -5a-e)
a. Scan the QR code or check phone for connection notification.
b. Follow the steps on the device.
c. Users will be logged in
View or Delete Passkey
- To view registered authenticators,
a. Go to ERS profile page at the drop-down menu (Figure 4),
b. Choose View Authenticators All registered authenticators will be listed. (Figure 13)
2. The saved passkey information can be deleted from ERS site.
a. Go to ERS profile and the drop-down menu. (Figure 4)
b. Choose View Authenticators
c. Click the trash bin next to the authenticator to delete.
d. Users enter the registered ERS password. (Figure 14)